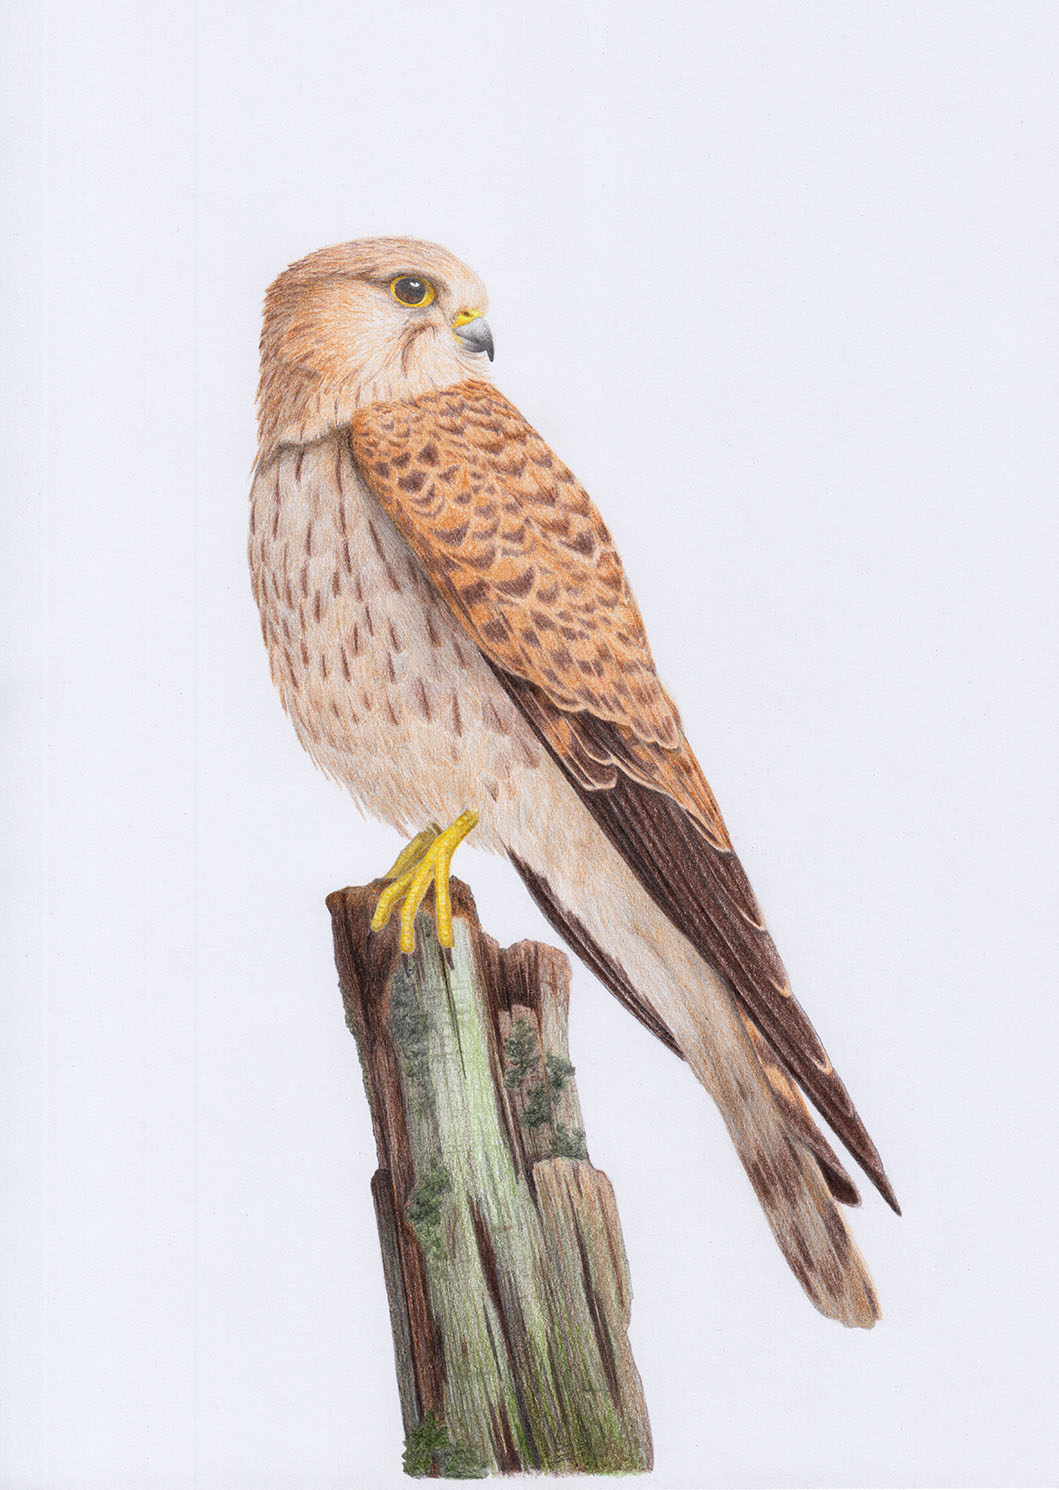
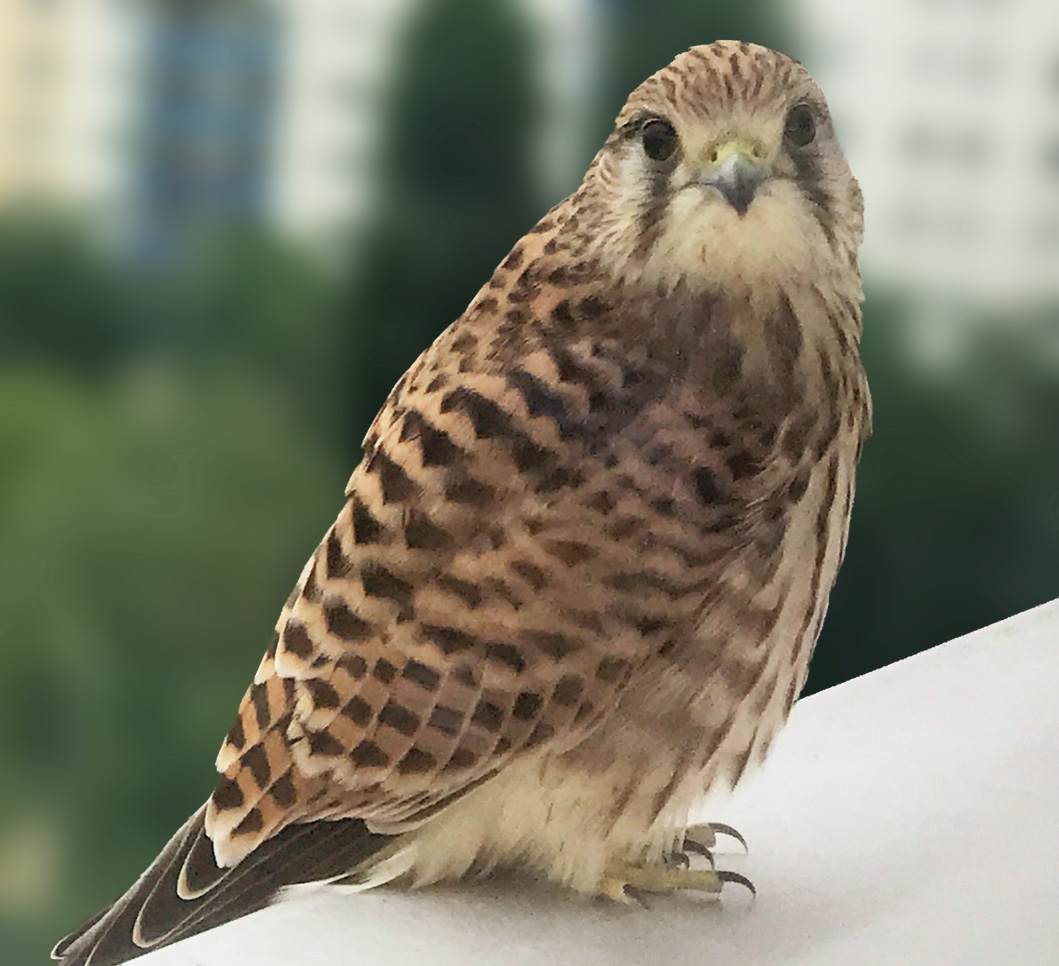
Some time ago, a captivating event occurred on my windowsill: Two young kestrels paid a visit, and I was fortunate enough to capture a few photos of them. Their visit not only brought immense joy but also ignited my artistic inspiration!

Within this tutorial, we will embark on a step-by-step journey to draw a falcon. While I’m focusing on a kestrel, you’re welcome to select a different falcon species or follow along with my instructions. The process is akin to drawing a bird.
Selecting Colors for Your Falcon Drawing
If you’re using colored pencils, watercolors, or other mediums, I recommend pre-selecting your colors and testing them on a separate sheet of paper.
For my drawing, I’m utilizing the following colors from my Faber-Castell Goldfaber watercolor pencils:
Colors for the Plumage

- 187 Burnt Ochre
- 177 Walnut Brown
- 105 Light Cadmium Yellow
- 108 Dark Cadmium Yellow
- 273 Warm Grey IV
Colors for the Branch

- 172 Earth Green
- 177 Walnut Brown
- 187 Burnt Ochre
- 167 Permanent Green Olive
Step-by-Step Guide to Drawing the Falcon
Before we begin, procure a suitable reference image (or several) to work from. High-quality photographs are optimal for this purpose, and platforms like Wikimedia Commons offer a plethora of options. Enhanced image quality enables you to closely examine the falcon’s features and incorporate that insight into your drawing.
Outlining the Falcon’s Basic Shape
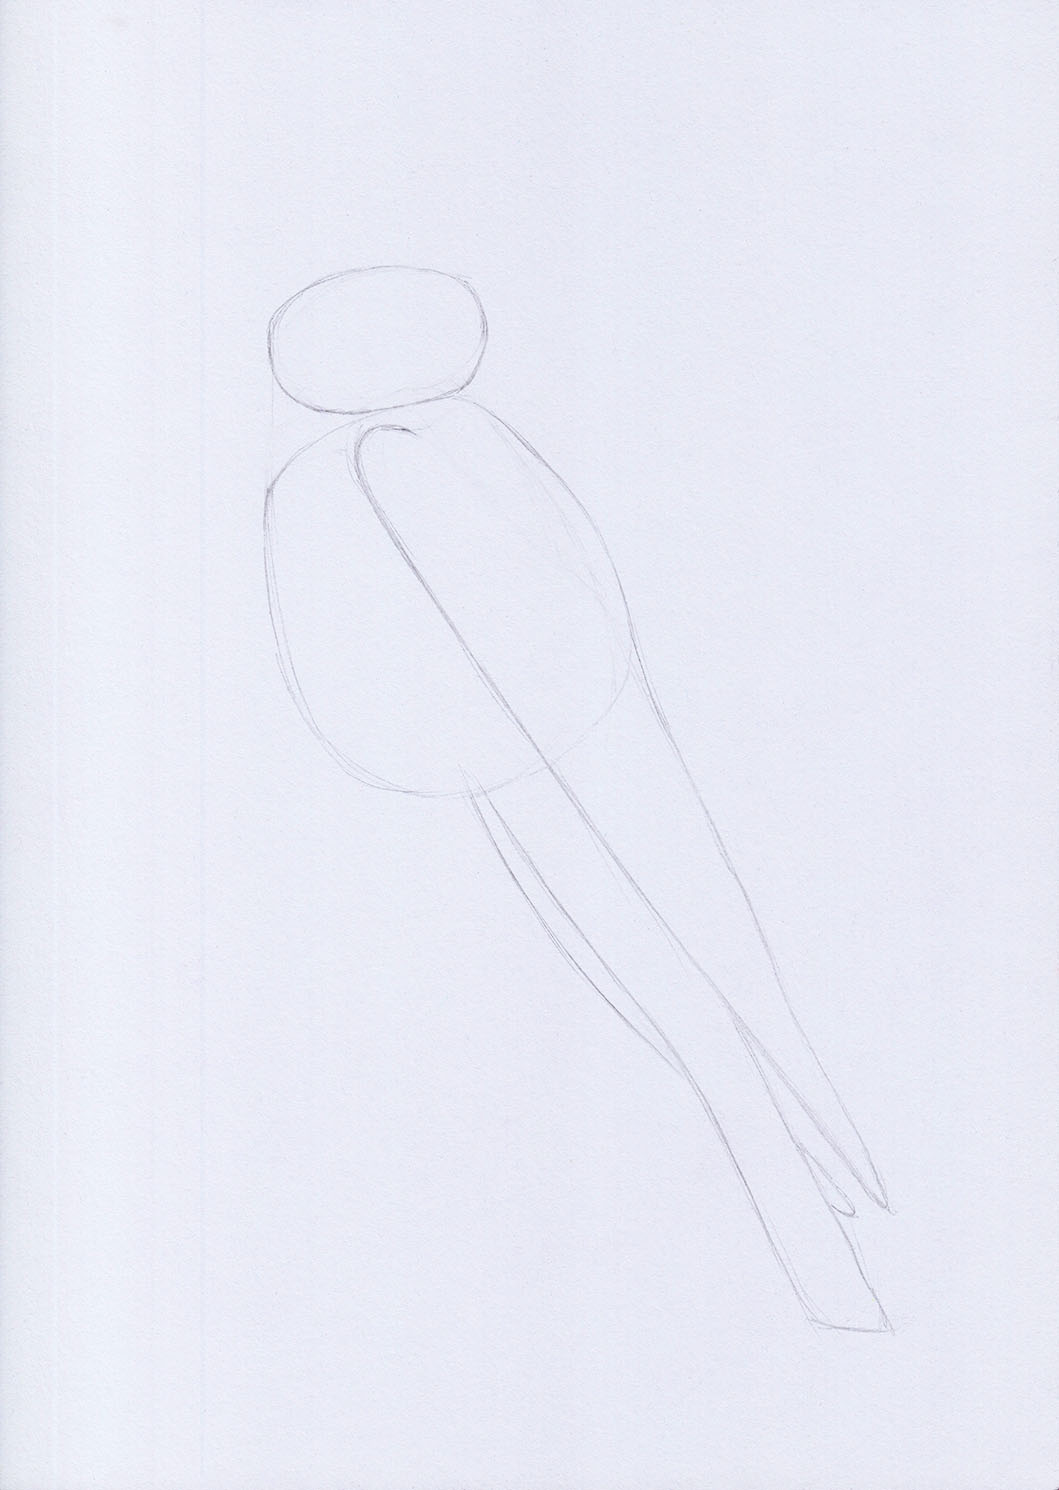
Initiate the process with a straightforward sketch to establish the fundamental shape. The kestrel’s head possesses a relatively flat structure, making an oval an excellent foundation.
The body maintains a rounder contour than an egg but remains narrower than a circle. Keep in mind that these two shapes might not align seamlessly if the head or body’s orientation differs.
In my drawing, they connect on the right side, leaving more space on the left.
The falcon’s wings extend approximately twice the length of its body, with the tail concluding around the same point as the wings.
While the wings narrow to a point, the tail exhibits a more rectangular form.
Detailed Sketch of the Falcon
During the detailed sketch phase, expand upon the initial shape.
Position the eyes in the upper segment of the head, and allocate the beak to the lower portion.
For those drawing a falcon with distinctive plumage, consider incorporating pertinent markings at this point. The female kestrel’s plumage is relatively uniform; therefore, I only mark two areas on the front wing.
Also, don’t forget about the falcon’s legs and the object it’s standing on. I go for a branch, but will add details to it in a later step.

Drawing the Head of the Falcon
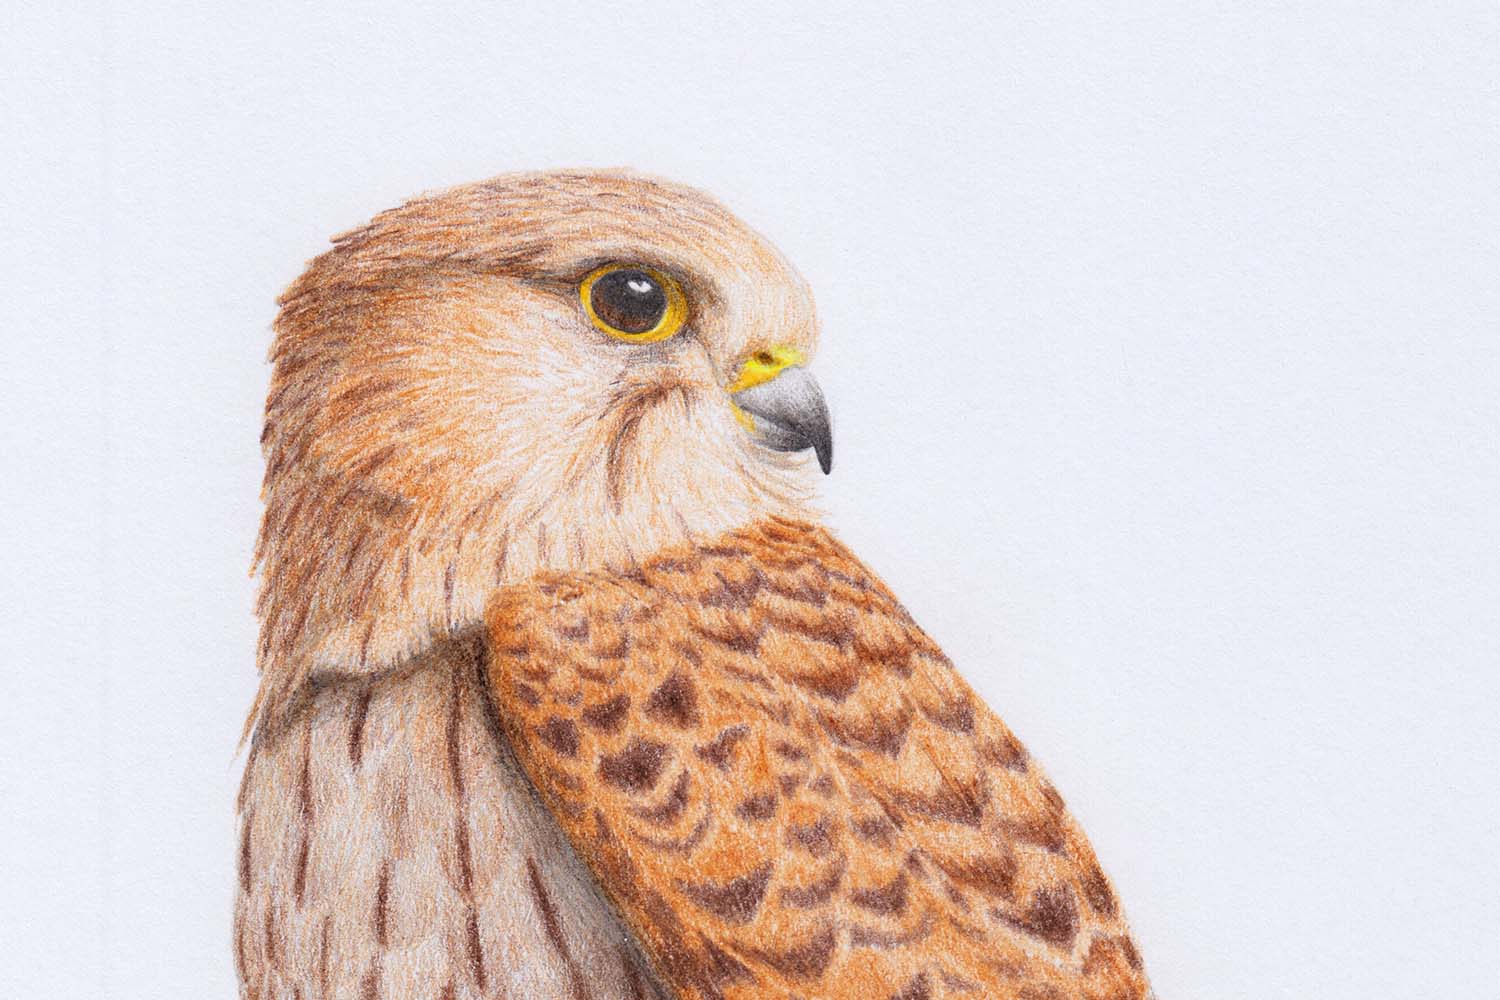
Given the small size of the feathers on the head, drawing them individuall is unnecessary. For the illusion of feathers, implement short strokes resembling the letter V.
My primary choice is burnt ochre for this stage, interspersed with occasional strokes of walnut brown.
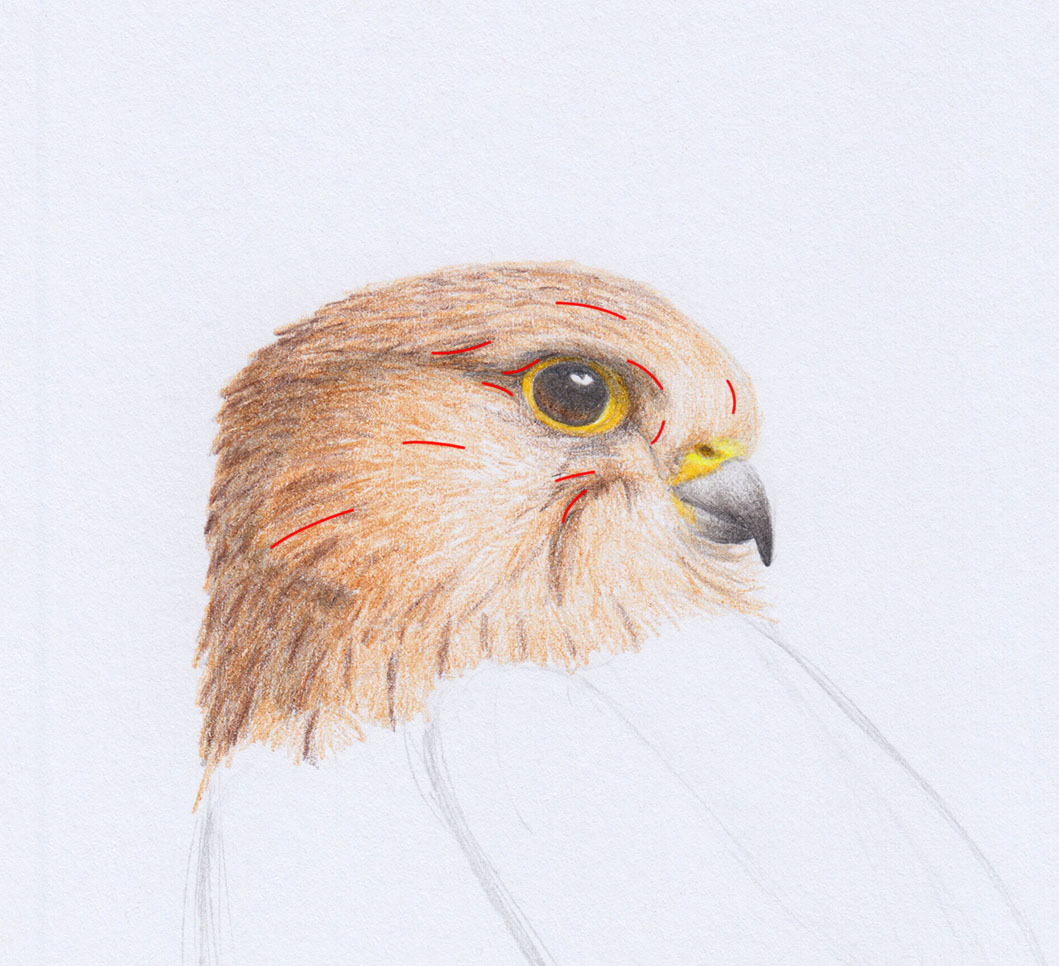
In order to make the falcon look realistic, meticulous attention to the direction the feather grows is crucial, and this varies across all areas.
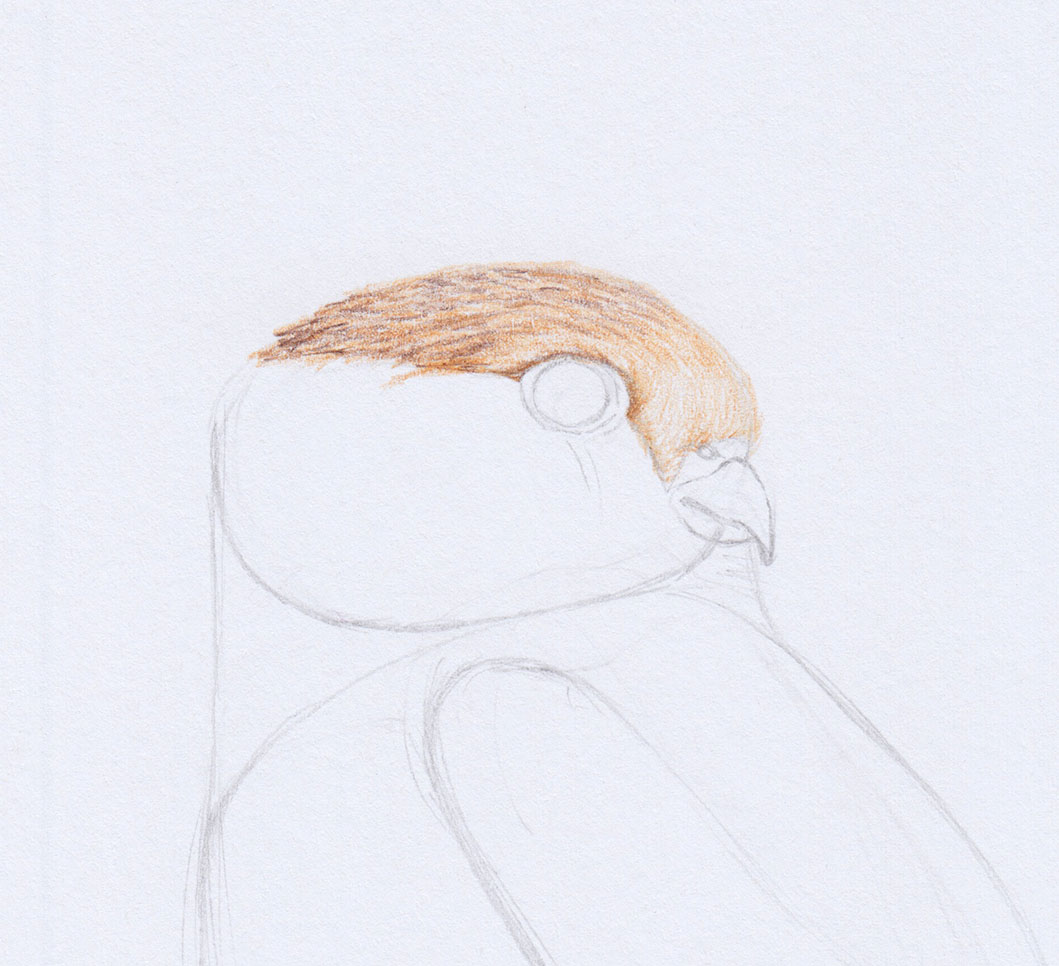
For example, a wave can be seen in the upper area, which starts at the beak, runs along the eye and ends at the back of the head.
In addition to the direction of growth, we should also pay attention to the shadows we use to model the head. The feathers stick out above the eye and cast shadows on the eye.
Close observation of your reference will facilitate the identification of these subtle variations.
Drawing the Belly of the Falcon
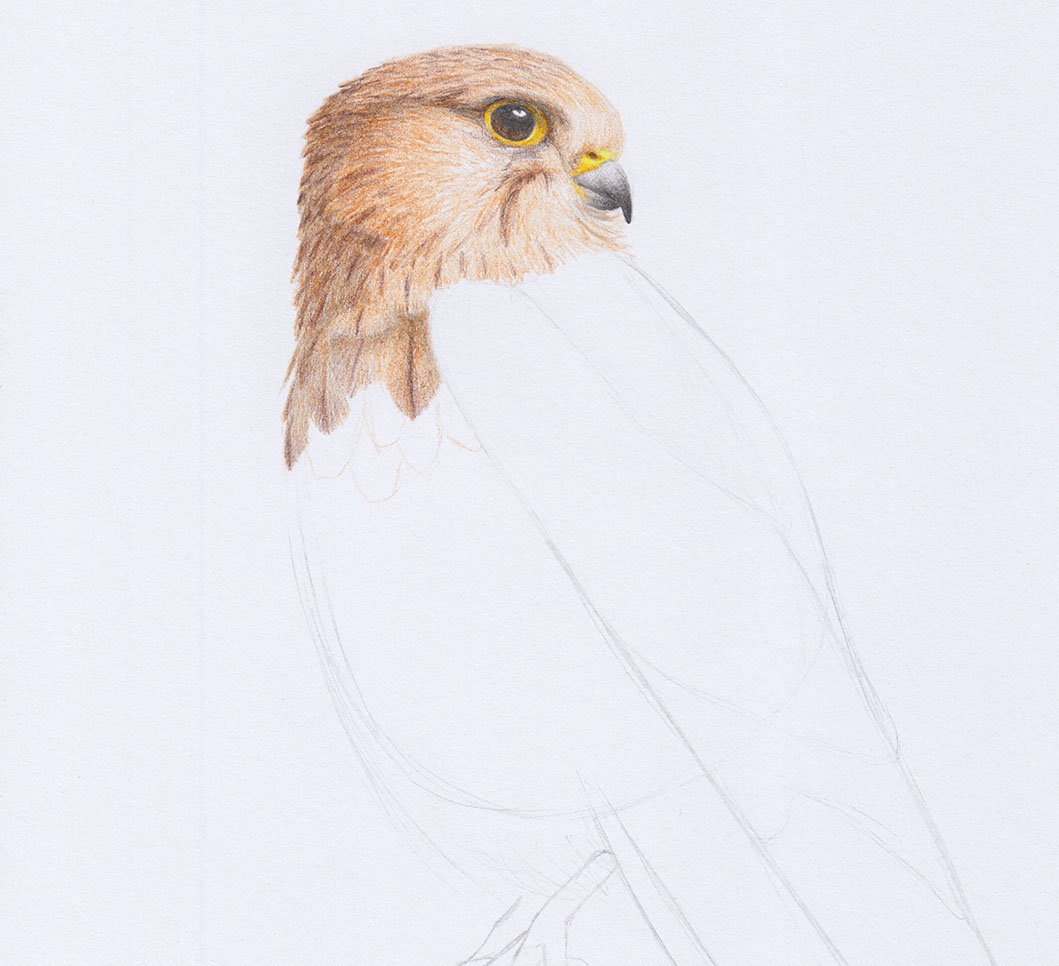
The kestrel’s abdominal feathers predominantly possess a light hue, adorned with a dark brown motif.
To navigate this intricacy, adopt a straightforward technique: outline the feathers as if they were bricks, then systematically refine each feather.

Drawing the Wings of the Falcon
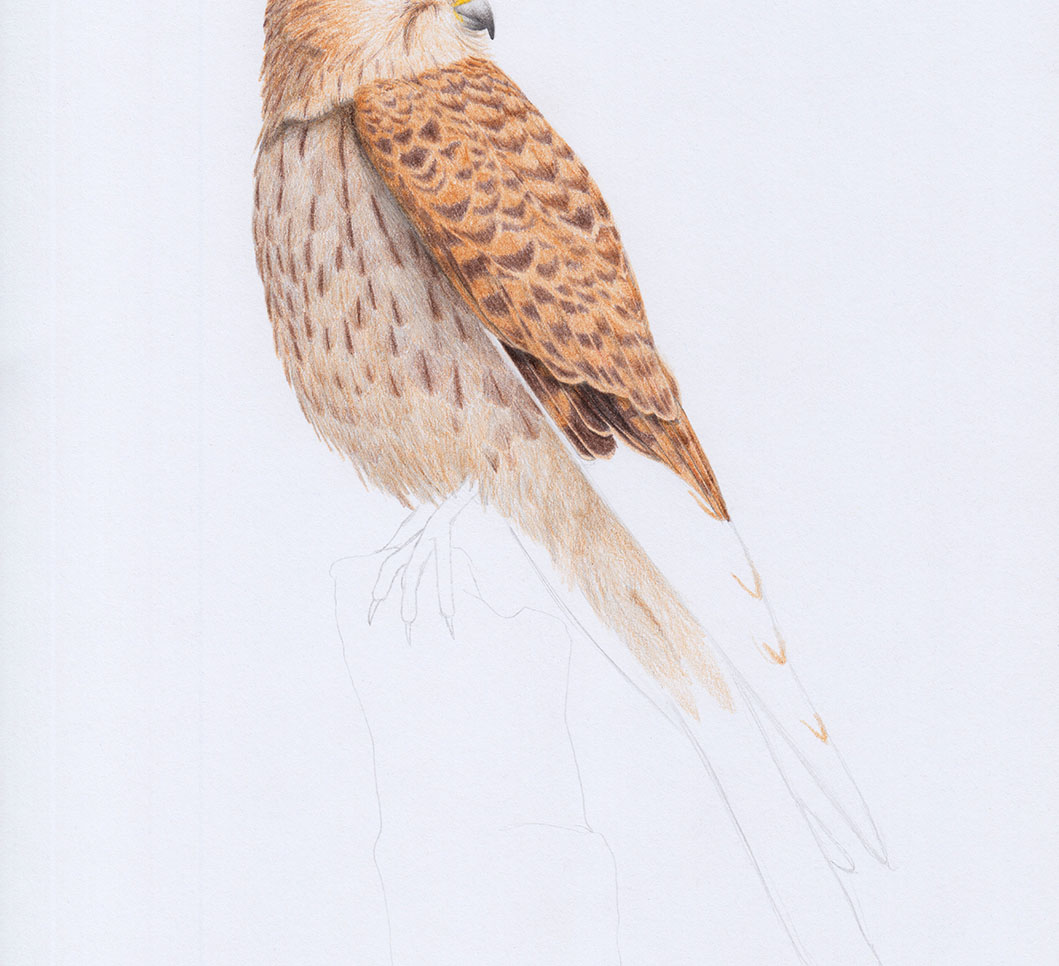
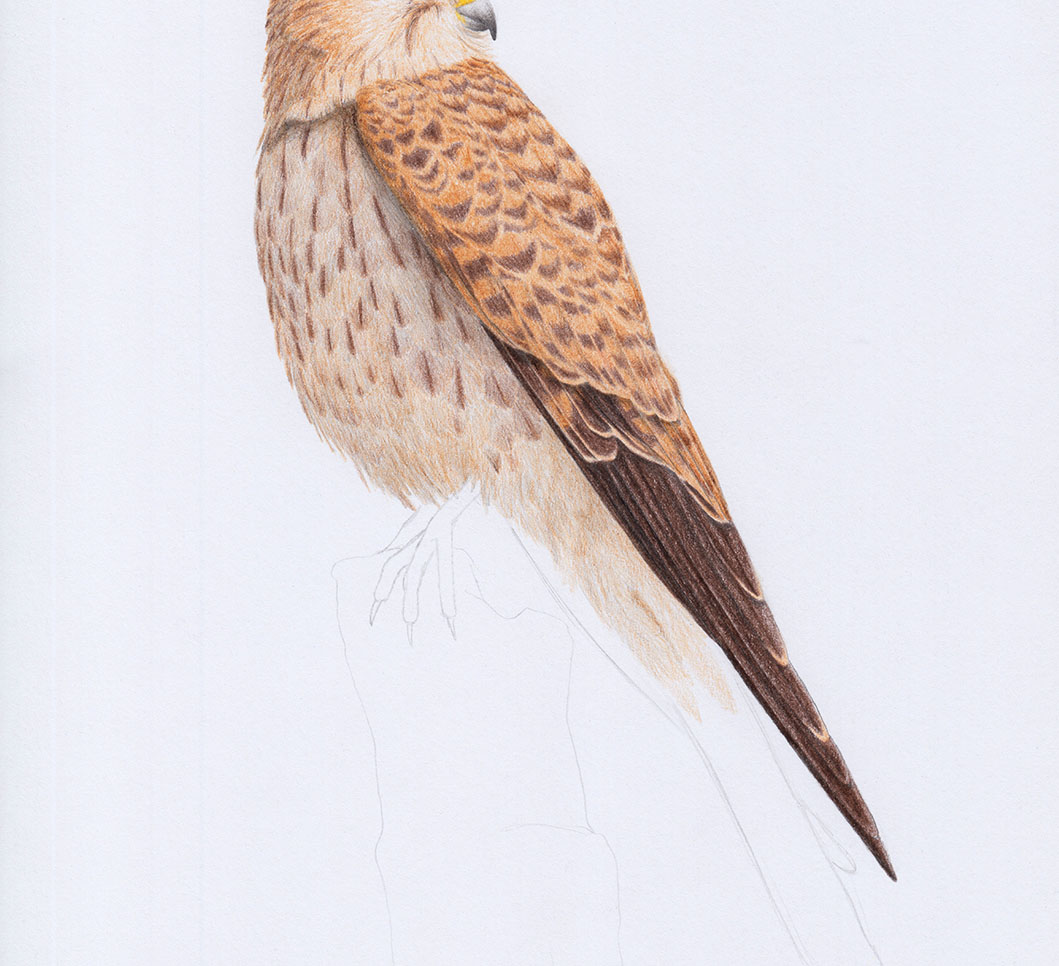
Drawing the falcon’s wings follows a similar principle to the abdomen. Divide the wing into discrete sections, then draw individual feathers sequentially.
Flawless feather depiction is unnecessary everywhere. In my drawing, the upper section posed particular challenges, and while I only hintes at most feathers there, it’s not noticeable.
For the wings, the shadows are mainly responsible for making your drawing look realistic. You can see that quite well from the long feathers in my drawing. Although I drew them fastest out of all feathers, they look the best. Apply narrow shadows along adjacent feather edges, and keep the outer edge lighter.
Drawing the Tail of the Falcon
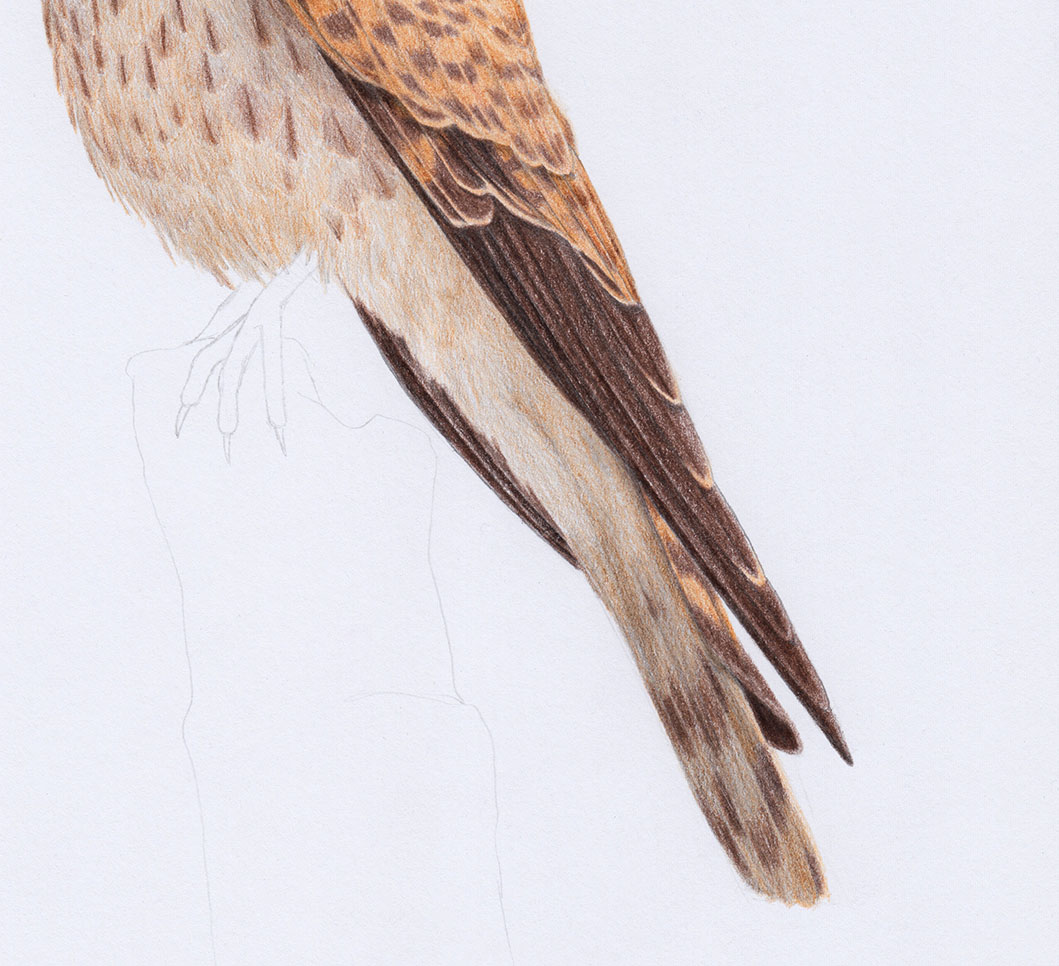
Tail feather patterns may vary by falcon species. In the case of the kestrel, tail feather arrangement mirrors that of other feathers.
Considering that my drawing depicts the falcon’s tail from an bottom perspective, the colors are slightly lighter. Simultaneously, this region is shrouded in shadow, so I use a 2H pencil to make it all darker.
Drawing the Legs of a Falcon
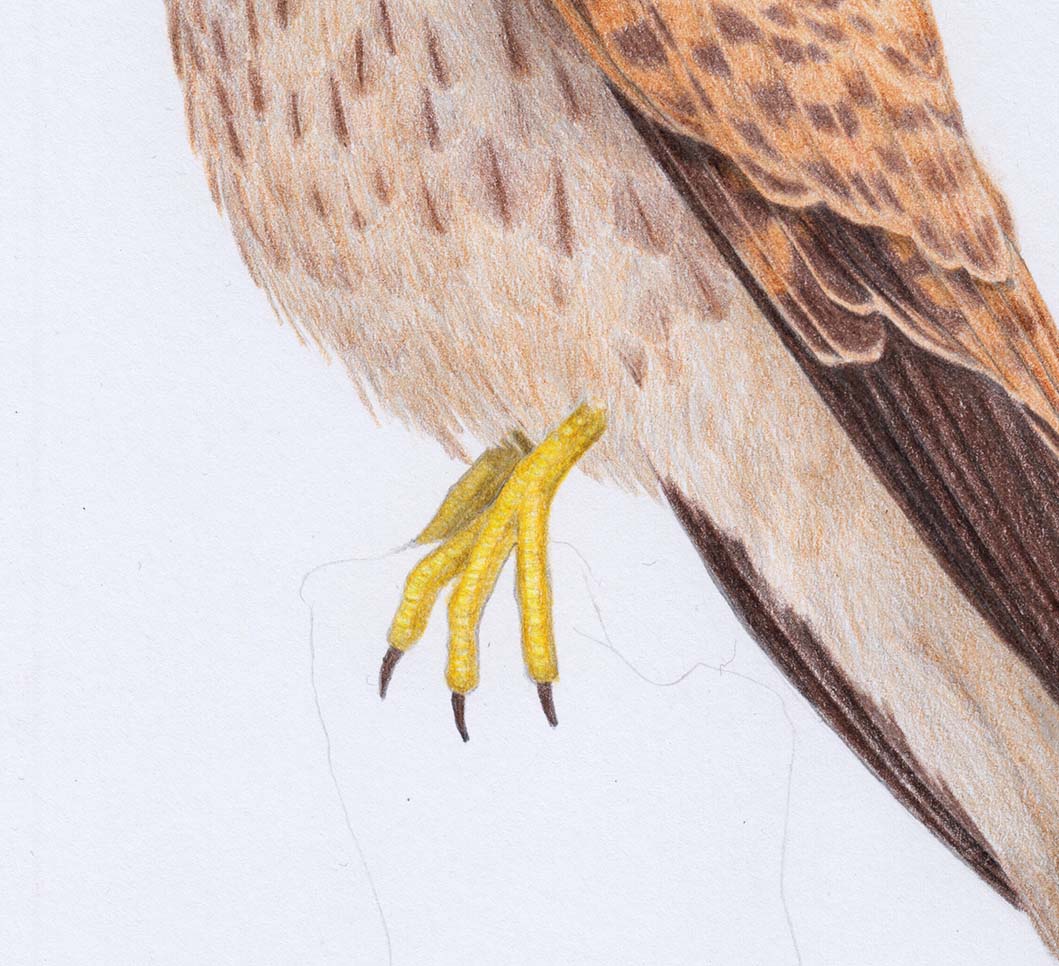
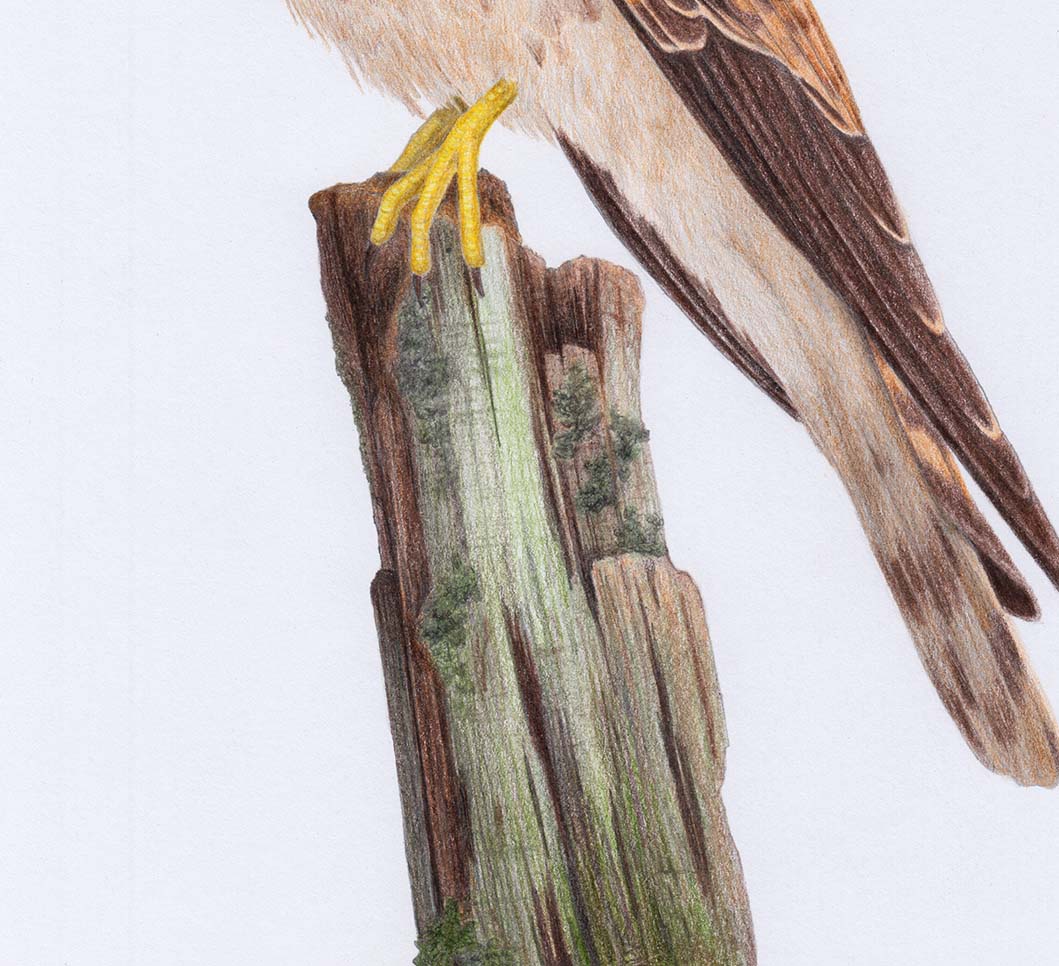
The falcon’s legs introduce another splash of color to the composition. I’ve picked the same shades of yellow used for the beak.
However, the leg’s skin isn’t uniform and showcases distinctive texture. I draw in circular motions with the two yellow pencils.
For shaping, I utilize the lighter yellow shade for illuminated areas, while the darker hue complements the 2H pencil’s contours.
Drawing the Branch for the Falcon
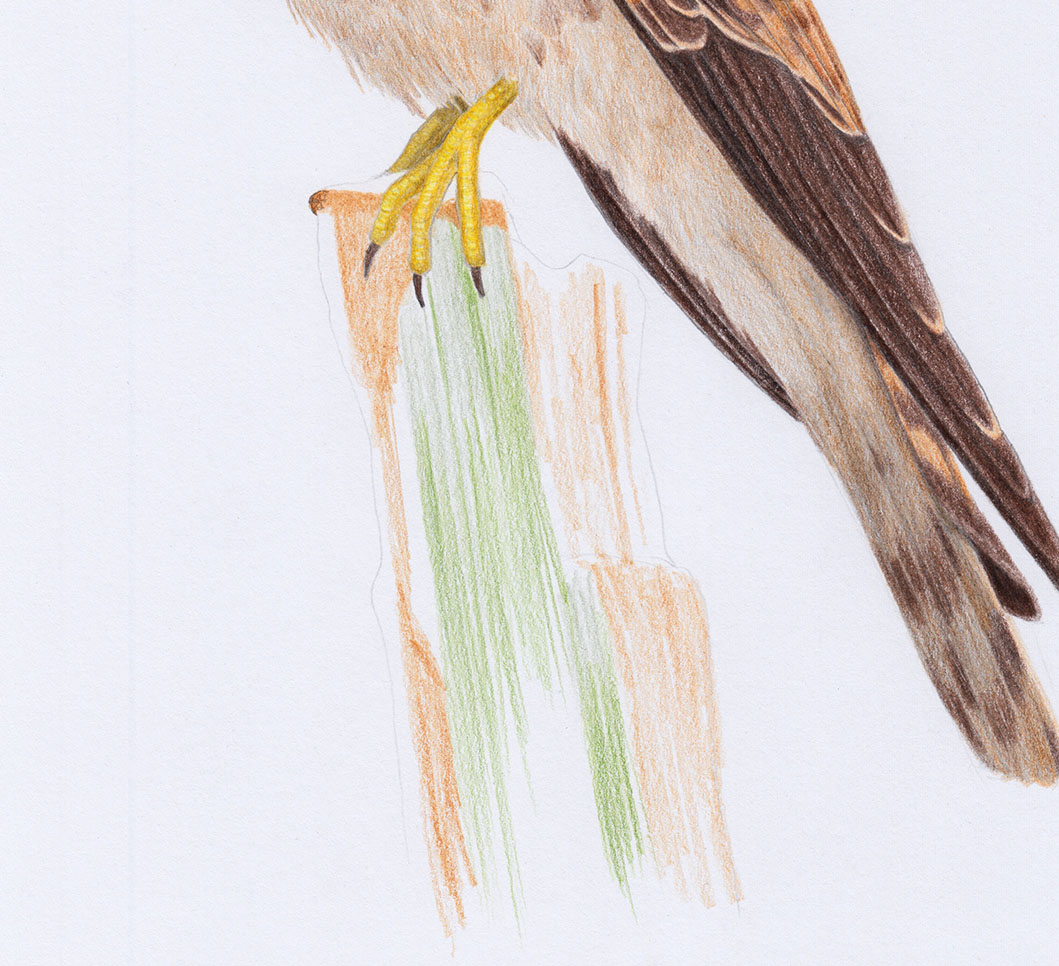
We are nearly done with our drawing! Depending on your remaining energy, you can opt for a simple monochromatic branch or a more detailed version.
For a branch with diverse areas or colors, I recommend to draft rough outlines beforehand. This approach facilitates a focused approach to each section, enhancing the portrayal of wood textures.
The Final Falcon Drawing
A big thank you to the two little kestrels who inspired me to create this drawing! I hope you found this tutorial helpful and that you had as much fun drawing your falcon as I did mine.
